Makes enough pie dough for one 9-inch double-crust pie
Ingredients
For the Crust
- 390g (about 2 ½ cups) all-purpose gluten-free flour, more for rolling the dough (preferably Bob’s Red Mill 1-to-1 Baking Flour)
- 1 Tbsp granulated sugar
- 1 tsp kosher salt (preferably Diamond Crystal)
- 220g (1 cup / 2 sticks) unsalted butter, frozen
- ½ cup water
- 1 Tbsp apple cider vinegar
- Ice cubes
For the Filling
- 1/4 cup granulated sugar
- 2 to 3 Tbsp tapioca flour
- 1/4 tsp cinnamon
- ¼ tsp kosher salt
- 8 cups drained canned unsweetened pitted sour cherries (We use four 14.5 oz cans of Gefen brand.)
- 1 Tbsp high-quality wine vinegar (We love Acid League’s Strawberry Rose Vinegar.)
- 1 1/2 tsp pure vanilla extract
- ⅛ tsp pure almond extract
- finely grated zest of 1 lemon (We use a rasp-style grater.)
For the Cutout Topping
- 3 Tbsp milk or heavy cream
- Coarse raw sugar (such as Turbinado, Demerara, or Muscovado) for sprinkling
TIP:
- Canned or jarred unsweetened sour cherries are available online or at some well-stocked supermarkets. (We use the brand Gefen.) Frozen sour cherries are available online at Friske Orchards.
Instructions
Step 1In a large bowl, whisk together flour, sugar, and salt. On the large holes of a box grater, grate frozen butter directly onto the flour mixture. Working quickly so the butter doesn’t soften and get sticky, use a fork to gently toss the butter and flour together. (If the butter starts softening, stop mixing and place the entire bowl into the freezer for about 5 minutes or the fridge for 15 minutes.)

Step 2
Place the ½ cup water and cider vinegar into a cup or small bowl; add a few ice cubes and stir. Drizzle 1 Tbsp of this ice water onto the flour mixture, raking the mixture well with a fork before adding more water. As needed, continue to add ice water, 1 Tbsp at a time and raking and tossing the mixture with a fork, until a shaggy dough starts to come together. Expect to add about 3 to 6 Tbsp ice water total. The dough should be a rough, rather dry mass with visible smaller bits and bigger chunks of butter. It should be moist enough to hold together when you squeeze a handful in your fist, but it should not be smooth or sticky. It’s important to use as little water as possible to create your dough.

Step 3
Spread out a large piece of parchment or plastic wrap on your counter and dust it with flour. Dump your dough onto it. Use your hands to gather it all into a workable mass and knead a few times to incorporate all the bits into a rough ball. Divide the ball into two portions, one slightly larger than the other. Gently pat each into balls; then flatten into 1-inch-thick disks. Wrap each in plastic wrap and refrigerate for at least one hour (and up to three days) before rolling out and baking. (Dough can be frozen for up to one month.)

Step 4
When it’s time to roll out the dough, position a rack in the center of the oven and heat to 425℉. Take the larger piece of dough from the fridge. It needs to be cool but not hard, so let it soften on the counter until malleable enough to roll. Spread a large piece of parchment or plastic wrap on the counter and lightly dust with flour. Dust the dough with flour and drape another large piece of parchment or plastic wrap over it. With patience and a light touch, roll out the dough between the sheets into a round that’s about 3 inches larger than your pie dish and ⅜ inch thick.

Step 5
To transfer the dough to the pie dish, roll the dough up onto the rolling pin, starting at the far edge of the round. With the pie dish in front of you, starting at the edge near to you, unfurl the dough into the pan. Press gently to settle dough into the plate. If dough tears or cracks, just pinch it back together. Use a very sharp kitchen shears or paring knife, to trim excess dough, leaving a ½ inch overhang all around; fold it over and gently press onto the outer rim of the pie plate. Use a fork or spoon to create a decorative edge.

Step 6
Prick dough all over with a fork. Cut a square of parchment slightly larger than the pie plate. Place it over the dough and weigh down with rice, lentils, or beans. Bake until the crust edges are just beginning to turn light golden brown, 15 to 20 minutes. Transfer to a cooling rack and do not remove the paper and weights until the crust is fairly cool. (If you try to remove the parchment when the crust is hot, it’s likely to stick.) Lower oven temperature to 375℉.

Step 7
While the bottom crust is baking, make the filling. In a large mixing bowl, whisk together the sugar, tapioca, cinnamon, and salt. (Use more tapioca if you want thick filling; less if you want it juicy.) Add the drained cherries, vinegar, vanilla and almond extracts, and lemon zest to the bowl. With a large spoon or silicone spatula, fold it all together. Pour the cherry filling into the cooled pie crust.
Step 8
Place the remaining dough disk on a lightly floured sheet of parchment or plastic wrap. Again, the dough should be cool, yet soft enough to roll. Dust with flour and cover with another sheet of parchment or plastic wrap. As you did with the first piece of dough, gently roll into a round. To make a decorative cutout crust (see Step 9), roll it ¼ inch thick. (If you want to make a traditional double-crust pie, roll it ⅜ inch thick.)
Step 9
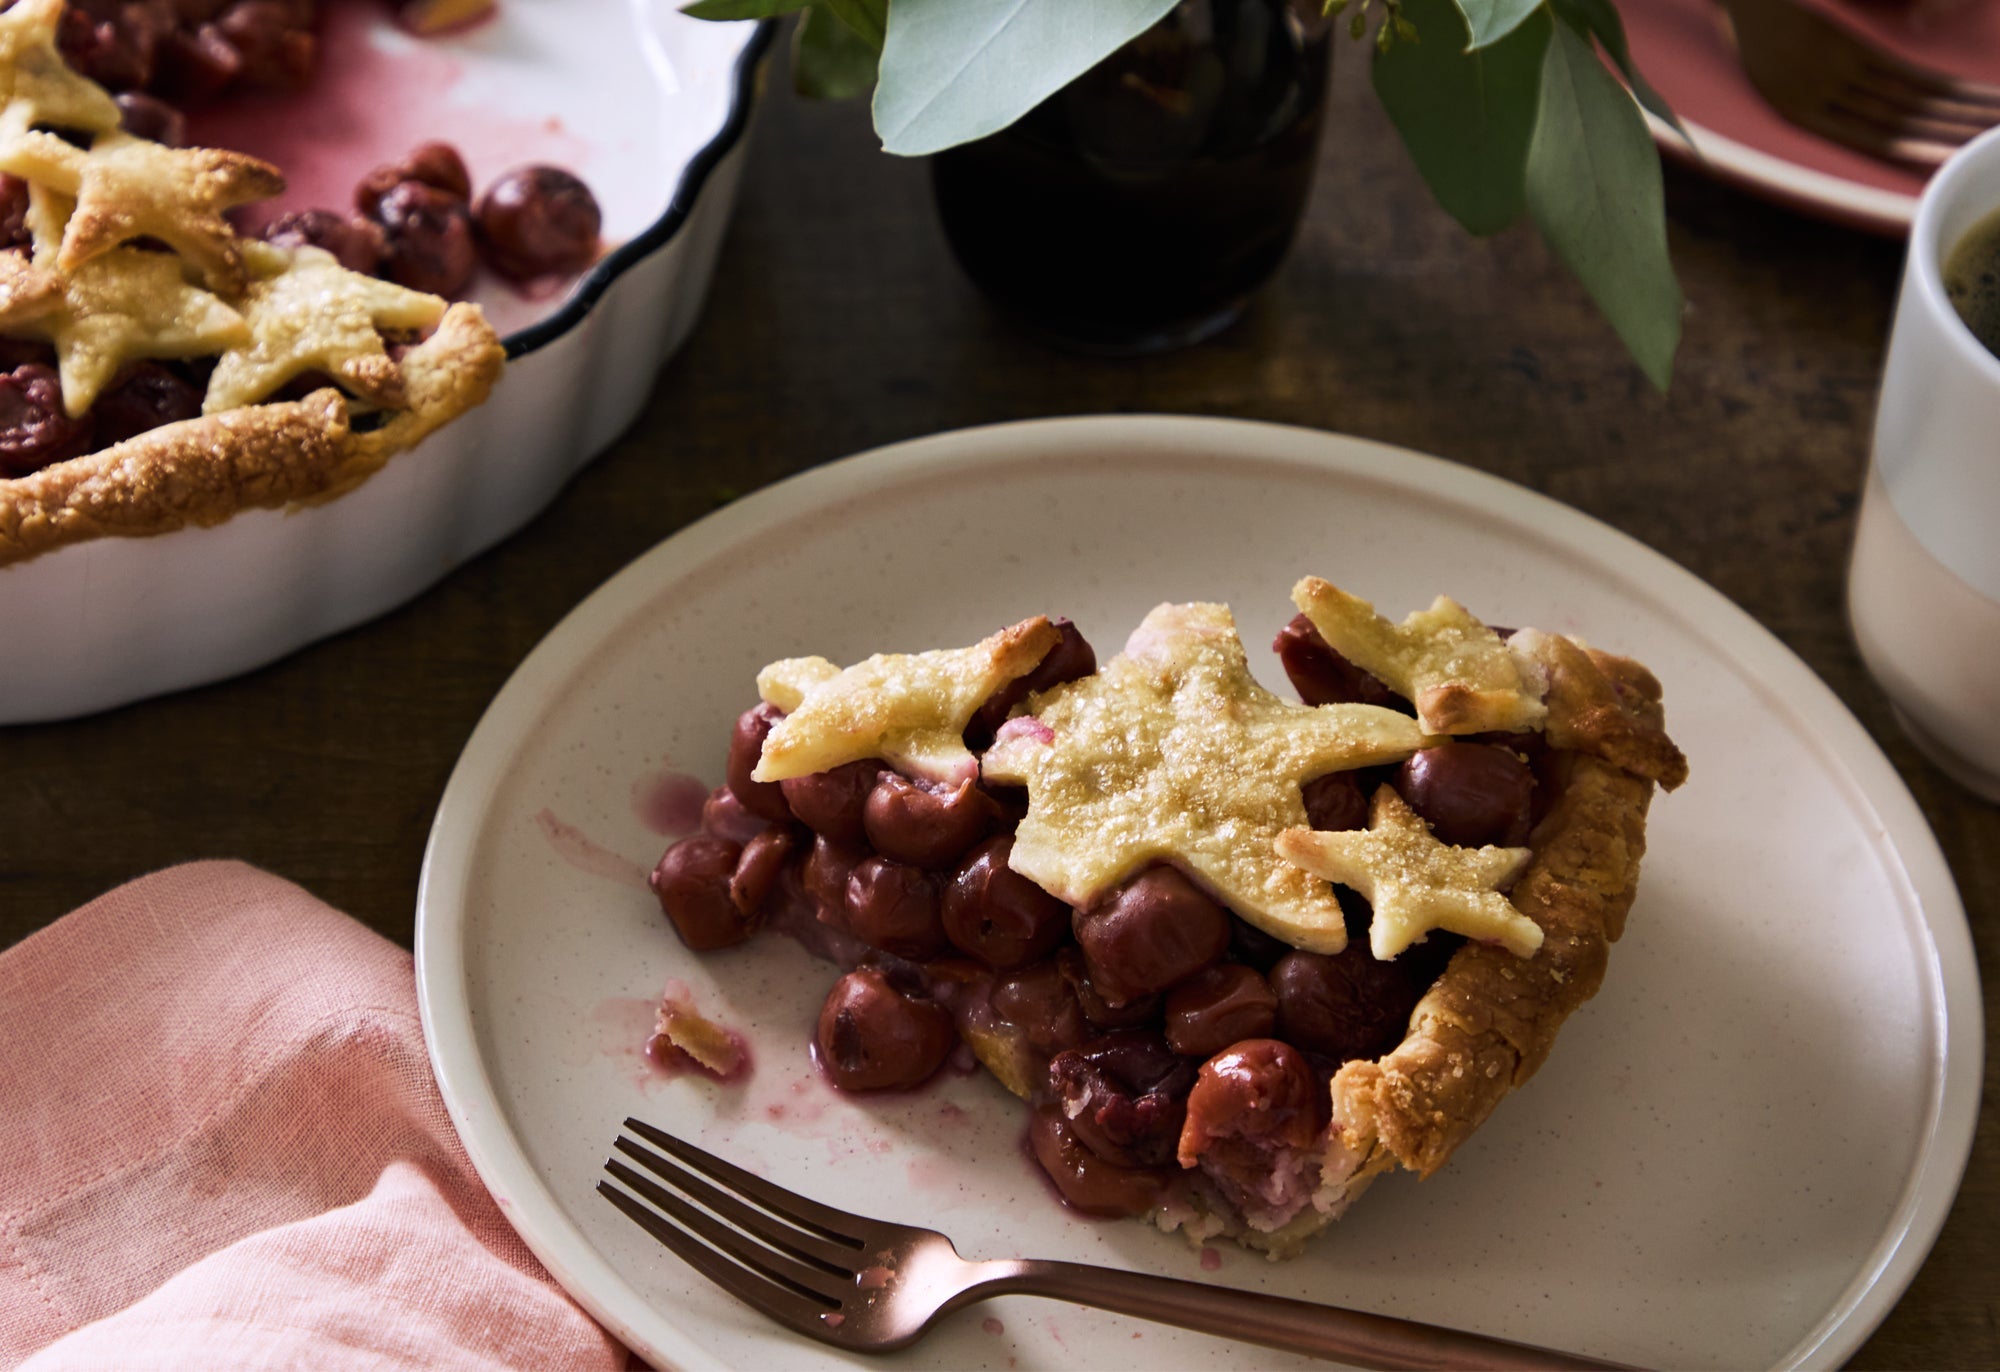
To make the cutouts, use your favorite cookie cutter(s) to cut out enough shapes to more-or-less cover the top of the pie. (Avoid using small cutters because tiny cutouts will brown before the filling is finished baking.) Use a small spatula to help you arrange the cutouts around the pie, slightly overlapping some of the pieces. Brush the cutouts with the milk or cream and sprinkle with the coarse sugar. Bake until the top crust is a rich golden brown and the filling begins to bubble, 35 to 40 minutes. If the crust is browning too fast, cover with foil and lower the oven temperature to 350℉.


Step 10
Transfer pie to a wire rack to cool until the filling sets. Serve with a big dollop of vanilla-bean ice cream.

Featured Products
Featured Posts


Join the Discussion